Use Instructions:
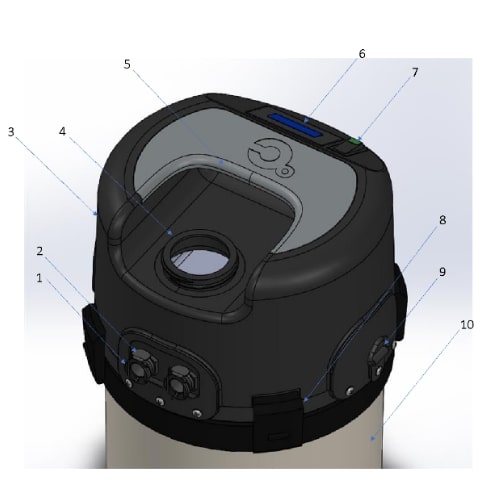
- Turn the CoolMitt device on using the lighted power switch (7). The device will reach its optimal temperature within a couple of minutes but you can use immediately.
- Place your hand inside the mitt fingers first so that your palm is resting gently atop the raised mound inside. The mound is designed to fit comfortably in the center of the palm to maximize contact with the entire hand.
- Make sure your hand slides in on top of the pad containing the running water.
*Note: Do NOT squeeze or grip the pad inside the mitt. Doing so reduces cooling efficacy and may damage the mitt.
- The pad should feel cool to the touch, NOT cold
- Use the CoolMitt device between sets, during breaks, and post-workout. You can use the CoolMitt device while exercising during certain workouts only if it is safe (i.e. walking on a treadmill or stationary bike). Let safety be your guide
- The CoolMitt device can be left running for easily repeated use within the same workout session.
- The more you use the CoolMitt device, the more you will be able to dissipate heat. Use for as little as 30 seconds will help, but the more time you can devote to cooling, the better the results will be.
- When finished, turn off the device and remove ice and water from the silver cooler bottom. It can be dried with a towel or left upside down to air dry.
- When storing for long periods or for air travel, ensure the closed recirculating system is dry and all tubing is free of tight bends and water. To remove the mitt from the base unit press the quick disconnect release button (2) on each of the quick disconnect ports (1) on the side of the base unit. *Note: Water will not drain from the mitt. See FAQs for draining instructions.